The Complete Guide to Growing Lush, Thriving Pothos Varieties in Soil
I’ve killed my fair share of plants. There was a time when I believed the myth that pothos are indestructible. I’d stick a cutting in water, watch it root, plop it into the first potting mix I found, and then wonder why, months later, it was a leggy, yellowing shadow of its former self. The real magic, I’ve learned through years of trial and error, isn’t just in keeping a pothos alive—it’s in understanding how to grow pothos varieties in soil to achieve that enviable, magazine-cover lushness. If you’re tired of sparse vines and lackluster growth, you’re in the right place. This guide is born from getting my hands dirty, meticulously tracking progress, and transforming my own collection into a jungle of vibrant, soil-grown pothos.
Why Soil is the Secret to a Fuller, Healthier Pothos

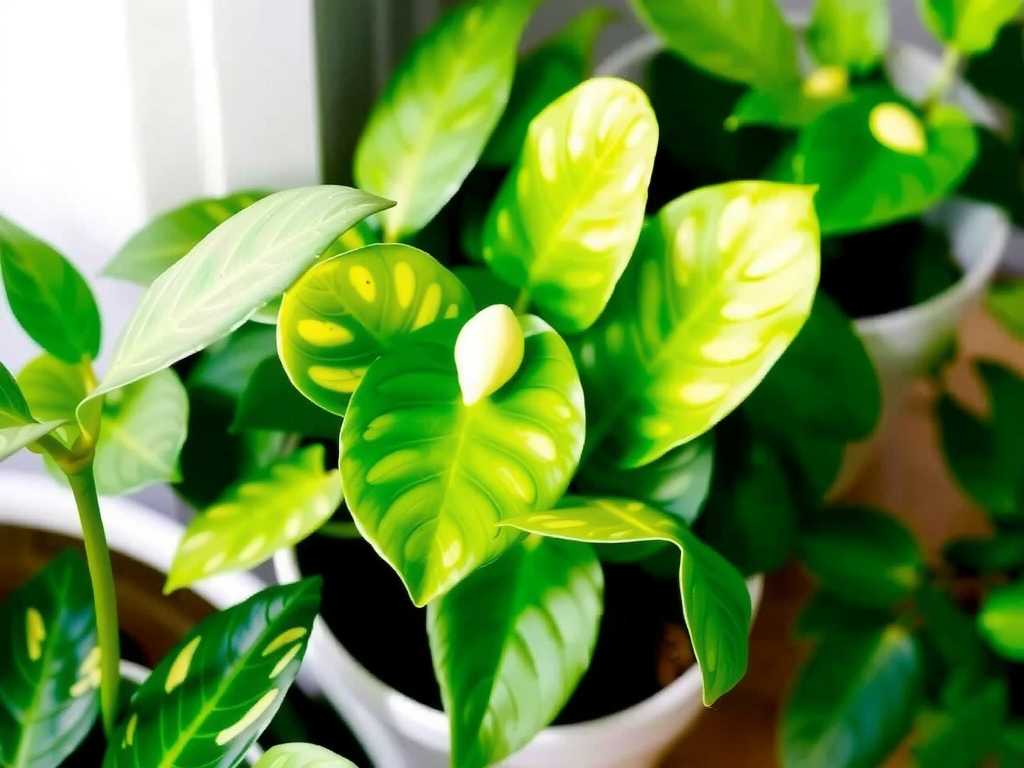
Many start their pothos journey in water, but soil is where these plants truly thrive and mature. According to principles echoed by the Royal Horticultural Society (RHS), soil provides a stable, nutrient-rich environment that supports robust root development and sustained growth, which is essential for the long-term health of any houseplant. Water propagation is fantastic for roots, but a water-grown plant is essentially in a state of suspended adolescence. Transitioning to soil allows it to access a broader spectrum of nutrients, leading to larger leaves, closer internodes (the spaces between leaves), and an overall more vigorous and resilient plant. My goal was to master this transition and the ongoing care for several varieties, from the classic Golden Pothos to the stunning Marble Queen and the neon-hued Neon Pothos.
My Two-Week Soil Growth Experiment: Setup and Observations
To provide the most actionable advice, I conducted a focused experiment. I took healthy, water-propagated cuttings of three varieties—Golden, Marble Queen, and Neon—each with established roots about 3-4 inches long. I potted them using the specific soil mix and method I’ll detail below. For two weeks, I tracked their progress daily, noting changes in leaf color, turgidity (firmness), and new growth.
Day 1-3: Post-potting, all plants showed slight wilting or drooping. This is normal transplant shock as roots adapt from water to soil. Day 4-7: The Golden Pothos perked up first. The Neon variety’s leaves lost a little of their “shock” brightness but remained firm. Day 8-14: By the end of the week, all plants were visibly stable. The key indicator? New growth. Tiny, sheathed leaf buds (called cataphylls) began to swell at the tips of the Golden and Marble Queen vines. This was the definitive sign of successful establishment.
The Foundational Step: Crafting the Perfect Pothos Soil Mix
This is the single most important factor I’ve identified. Pothos demand excellent drainage. They hate “wet feet.” A standard, dense potting soil will compact and retain too much moisture, leading to root rot.
My Recipe for Success:
- 40% High-Quality All-Purpose Potting Mix: This provides the base structure and initial nutrients.
- 40% Perlite: This is non-negotiable. Perlite creates air pockets, prevents compaction, and ensures water flows through freely.
- 20% Orchid Bark: Chunky bark further improves aeration and mimics the well-draining, loose medium pothos roots crave.
I mix this thoroughly in a large tub before potting. The result is a light, fluffy, and incredibly well-draining medium. The American Horticultural Society (AHS) emphasizes the importance of aeration in container soils to promote healthy root respiration, and this mix delivers exactly that.
Pot Selection and the Planting Process
Pot choice is crucial. Always choose a container with at least one drainage hole. I prefer terracotta pots for pothos, as the porous clay allows the soil to dry more evenly, reducing overwatering risks.
Here’s my step-by-step planting process:
- Prepare the pot by covering the drainage hole with a small piece of mesh or a shard to prevent soil loss.
- Add a 1-2 inch layer of your pre-mixed soil.
- Gently place your rooted cutting(s) in the center. For a fuller plant from the start, I plant 3-5 cuttings in one 6-inch pot.
- Hold the cutting upright and backfill with soil, gently firming it around the roots to eliminate large air pockets. The root ball should be buried just below the surface.
- Water thoroughly until water runs freely from the bottom. This “settles” the soil around the roots.
The Pitfall I Encountered and How I Fixed It
In my early days, I made a critical error: I used a pot that was too large. I thought I was giving the plant “room to grow.” What I actually did was create a huge volume of damp soil around a small root system. The roots couldn’t absorb the moisture quickly enough, the soil stayed wet for weeks, and the roots began to rot. The plant declined rapidly.
The solution is simple: Pot up gradually. Start your newly rooted cuttings in a pot just 1-2 inches wider than the root mass. Pothos actually enjoy being slightly root-bound. This encourages healthier growth and makes watering much more manageable. Only repot when you see roots circling the bottom of the pot or growing out of the drainage hole.
")
Optimal Care for Explosive Growth in Soil
Once potted correctly, care becomes straightforward.
Watering Wisdom: The “soak and dry” method is king. I never water on a schedule. Instead, I stick my finger about 2 inches into the soil. If it’s dry, I water thoroughly. If it’s damp, I wait. During my two-week experiment, I only needed to water once, around day 10. Overwatering is the fastest way to kill a soil-potted pothos.
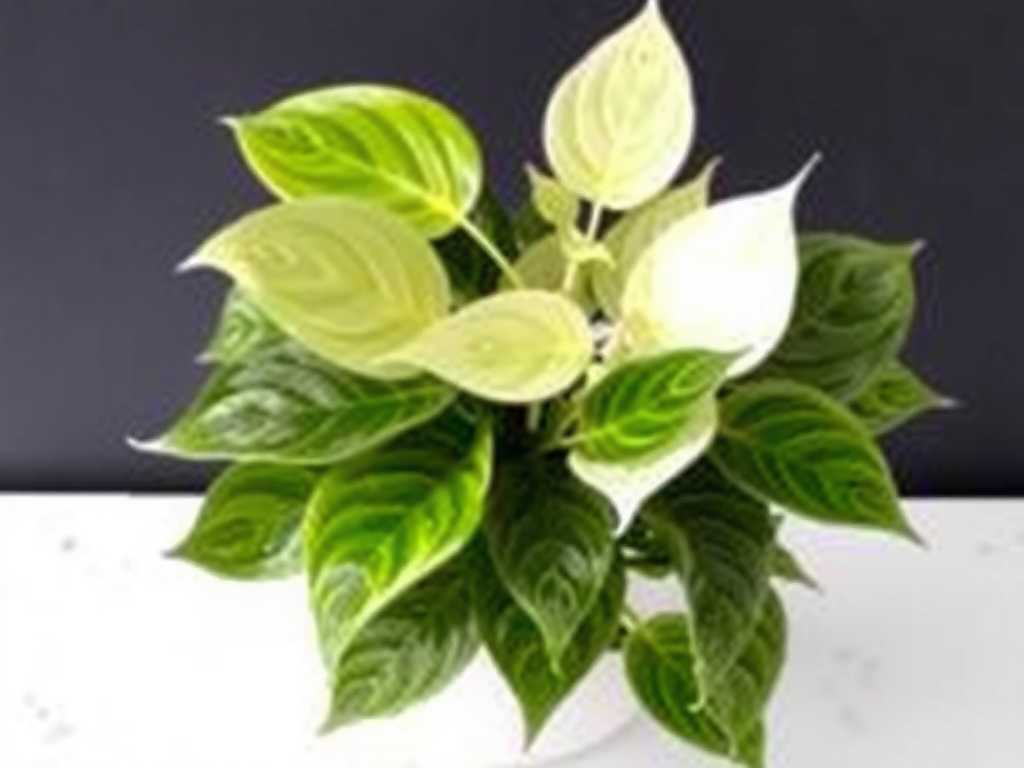
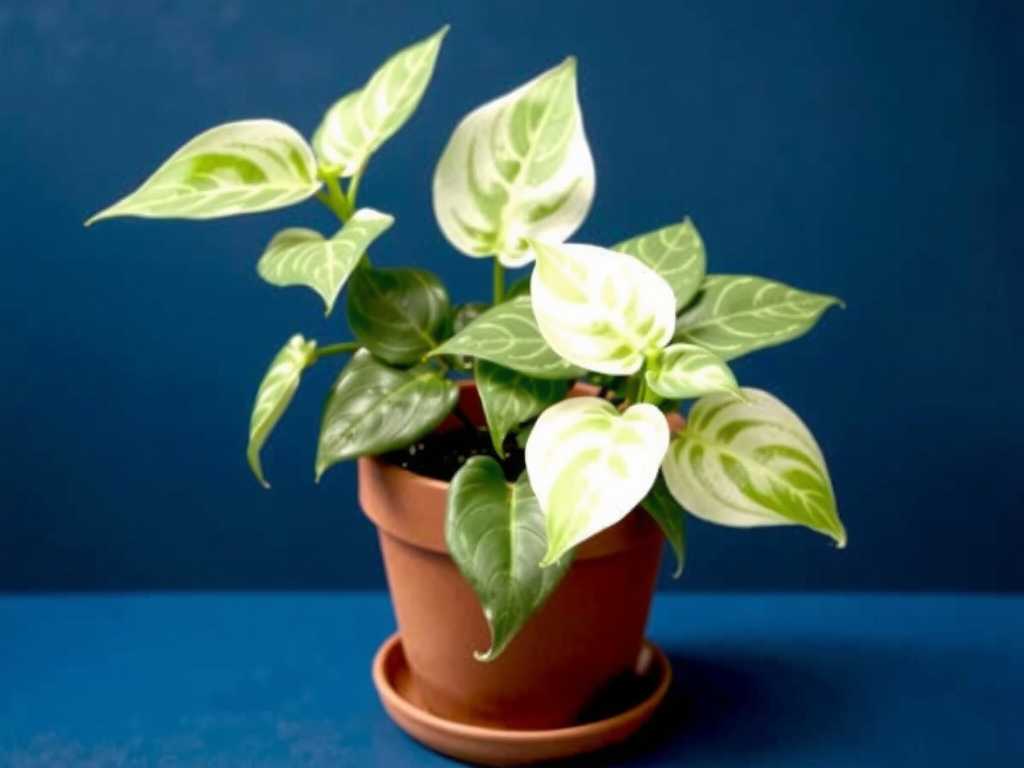
Light for Vibrant Varieties: While tolerant of low light, pothos varieties show their true colors in bright, indirect light. My Marble Queen’s variegation became more pronounced, and my Neon Pothos glowed. A north or east-facing window is ideal. Direct afternoon sun can scorch the leaves.
Feeding for Lushness: A month after potting, I begin feeding. I use a balanced, water-soluble houseplant fertilizer diluted to half-strength, applied once a month during the spring and summer. I skip fertilizing in fall and winter when growth slows.
Pruning for Perfection: Don’t be afraid to snip! Pruning is how you encourage a bushy, full plant. I regularly pinch off the very tip of a vine just above a leaf node. This signals the plant to send out new growth points further down the stem, creating a denser appearance.
Troubleshooting Common Soil-Grown Pothos Problems
- Yellowing Leaves: This is most often a sign of overwatering. Check your soil moisture and ensure your pot drains. It can also indicate a need for fertilizer if the plant is mature and hasn’t been fed.
- Brown, Crispy Leaf Tips: Usually a sign of low humidity or underwatering. While pothos tolerate average humidity, they appreciate occasional misting or a pebble tray, especially in winter.
- Leggy Growth with Small Leaves: The plant is not getting enough light. Move it to a brighter location (avoid direct sun).
Frequently Asked Questions
Can I move my pothos from water directly to soil? Yes, absolutely. The key is to have water roots that are at least 2-3 inches long. Be prepared for an adjustment period (transplant shock) of 1-2 weeks where the plant may wilt slightly as it develops soil-adapted roots. Keep the soil consistently moist (not soggy) for the first week to help ease this transition.
How often should I repot my pothos growing in soil? Pothos are slow growers and prefer to be snug. Typically, repotting every 1-2 years is sufficient. The best indicator is to check the roots in spring. If they are densely coiled at the bottom, it’s time to move to a pot one size larger.
Why are the leaves on my variegated pothos turning solid green? This is a reaction to insufficient light. The plant is producing more chlorophyll (green pigment) to maximize energy capture in low-light conditions. To restore the variegation in your Marble Queen, Snow Queen, or other patterned varieties, gradually move it to a spot with brighter, indirect light.
Growing pothos varieties in soil is a deeply rewarding practice. It transforms them from simple survivors into thriving, dramatic features of your home. By focusing on the foundation—a perfect, airy soil mix—and pairing it with mindful watering and good light, you unlock their full potential. The journey from a single cutting to a cascading, lush plant is a testament to a little knowledge and consistent care. Start with the soil, listen to your plant, and enjoy the growth.

发表评论